Thursday, October 3, 2013

From First Gear to Festival Premiere: Looking Back on Production, Taking ODD BRODSKY the Film Festival Route & Why Cindy Baer Keeps Going Back for More


The feature film ODD BRODSKY began as a passion project for director Cindy Baer and cinematographer Matthew Irving Now, after a seven-year journey including developing, shooting, editing, visual effects, sound and music, the film is ready to make its world premiere at the 36th Mill Valley Film Festival on October 4th and October 5th—and this has Baer ecstatic. 

“My husband Matt and I came up with the idea for ODD BRODSKY in 2006 when my first feature was playing at a film festival in Massachusetts. I shopped the script around but found it impossible to raise a real budget in this horrible economy. I was about to give up after a few years trying. That's when industry friends starting coming together to make it happen!” said Baer. “We prepped for about 2 months, and then shot at the end of 2011. We’ve been working hard to complete it and are so excited to see it on the big screen.”


Audrey (Tegan Ashton Cohan) and Camera One (Matthew Kevin Anderson)

Why Continue the Festival Route?

ODD BRODSKY is Baer’s latest film and her second full-length feature to be accepted into a film festival (her debut feature Purgatory House screened at 25 festivals and her short film Morbid Curiosity screened at 28 festivals) so taking the film festival route was always on her mind. But why continue the festival route? According to Baer, for exposure and validation. “More and more films than ever before are being made and more films than ever are going the festival route.  This makes the competition greater than it’s ever been as the larger star-studded films compete against tiny movies for highly coveted screening slots” explained Baer. 

“Getting into a good festival can help to garner press and reviews, and for the smaller films that don't have big stars, it can help validate the movie to an audience and to distributors. Smaller festivals are great too. The opportunity to bring your movie to a community and present it on the big screen before a live audience and do a Q&A is wonderful.  And if the audience likes your movie, they'll tell others about it.  In this day and age it's all about getting people to know your project," said Baer. "Nobody is going to watch it if they don’t know about it.”


Baer and husband Matt Irving Hard at Work
Delivering Quality Shots with a Tiny Budget

Being a micro budget project, Baer found herself wearing different hats in every department, and despite having limited resources she and her producing partner Thomai Hatsios were able to pull off traditional production values not found at the low-budget level. “Everything is lit, and the camera work is smooth and lyrical as opposed to handheld and frenetic. We're extremely proud of what we were able to accomplish in the 20 day shoot-- our feature spans multiple time periods (1971, 1980 and present day), has over 30 locations, rain, smoke, kids, animals and even a musical number! Over 50 actors had speaking roles, and the majority were women, which is not common.  There's also dozens of complex “real world” visual effects which help to fully create the world of the movie. And no story about Hollywood would be complete without a glimpse of the Hollywood sign, which we were grateful to have licensed.”


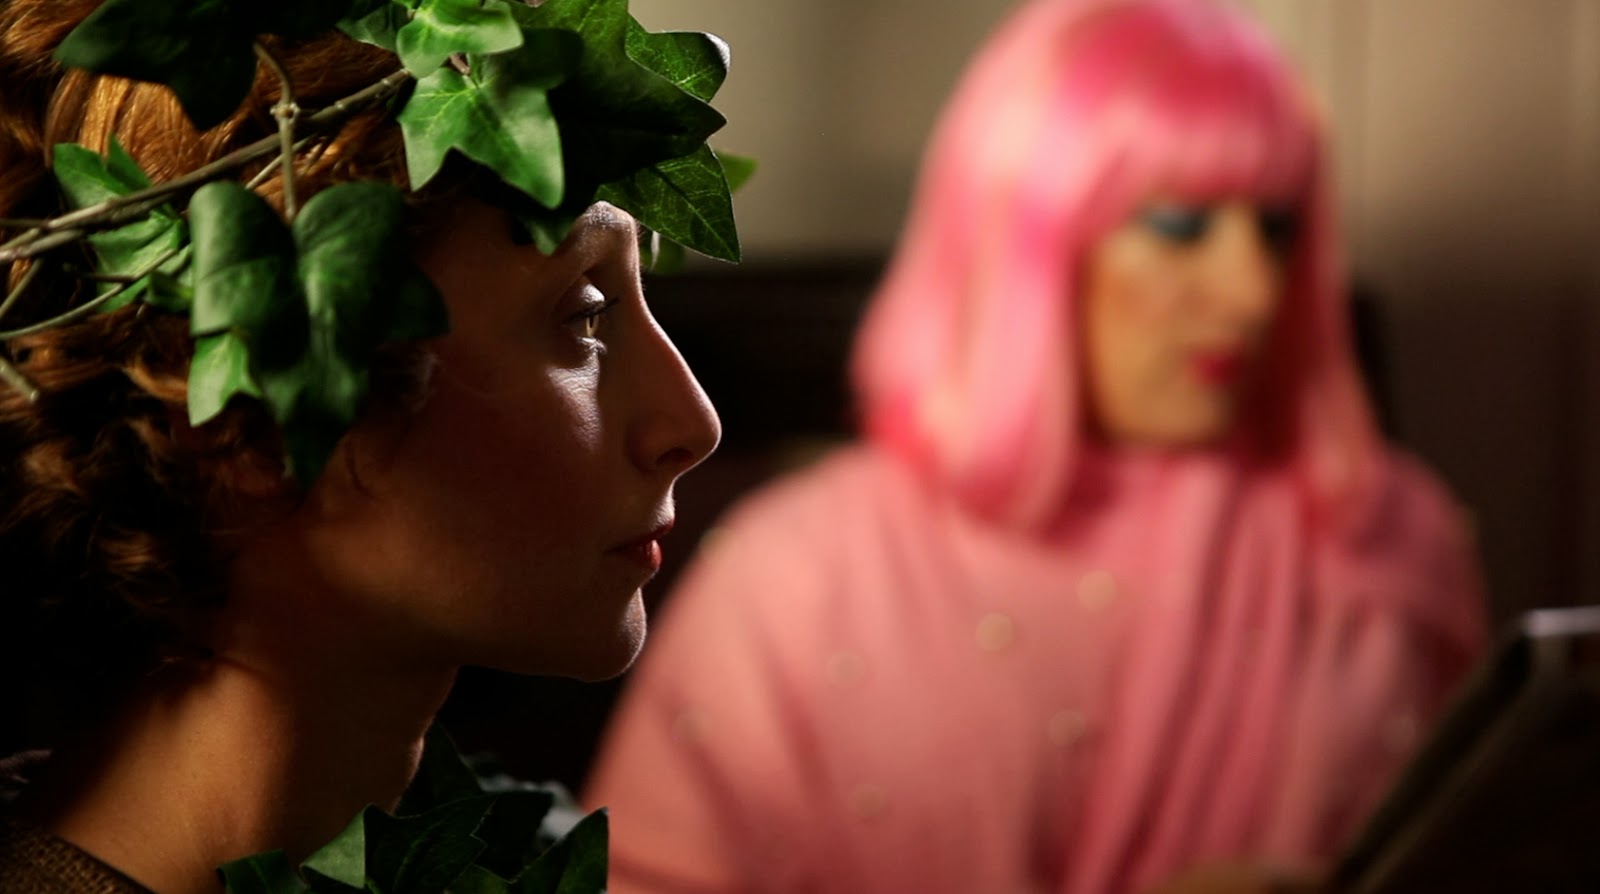
Tegan Ashton Cohan as Audrey and Jim Hanks as the actor who plays God (in pink)

Choosing the Right Gear

Budget also dictated Baer and Irving's choice in format and support gear; however, they found that choosing vendors that fit the budget was a no-brainer, and ultimately decided to go with Canon DSLRs and Redrock Micro rigs to shoot the film. 

“Canon DSLRs deliver by far the best image for the price, and the Redrock Micro rigs are the best I've found in terms of build-quality and flexibility. Even when we did go handheld, the Redrock Micro rigs allowed us to make it as smooth as possible, to deliver the more "classical" studio film look” recalled Irving. 

“We used the DSLR Field Cinema Bundle and added the microFollowFocus and microMatteBox Deluxe. Once fully built, the shoulder rig/follow focus/matte box combination--together with the Canon 5D Mark II--became our "studio camera" for the show.  We would keep it built in this configuration whether we were on sticks, dolly, or handheld.  The thread on the bottom of the shoulder rig was a genius addition from Redrock Micro, which allowed for this flexibility," described Irving. "We were able to go from sticks to handheld in no time at all; we merely had to release the plate from our Sachtler tripod and we were good to go.”


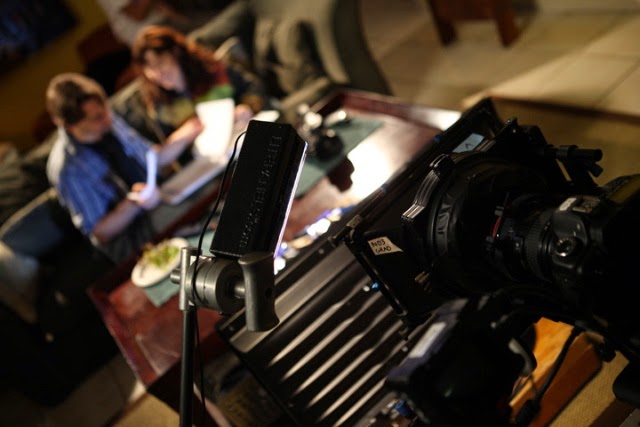
On Set with Redrock Gear 

Baer and Irving enjoyed the modularity of each piece of Redrock gear they used on the shoot, adapting the gear to their own specific needs and making it work quickly and easily. “The Canon 5D Mark II is an amazing camera, but it can experience some warping and rolling (commonly called the "jelly roll" effect) if certain vibrations are present during the shooting. The Redrock shoulder rig eliminated this problem by adding just the right amount of bulk and weight, while providing a more sturdy contact point with the body. In my experience, a handheld shot literally goes from "unusable" to nearly Steadicam-smooth when you use the Redrock Micro rig.”


Preparing for the Next Scene

Irving credits the gear in helping to achieve a smooth and lyrical feel in the shots and had such a great experience would use them again in future projects. “I would use the rigs again in a heartbeat. In fact, I consider the shoulder rigs (together with follow focus and matte box) to absolutely integral tools whenever I'm shooting with Canon DSLRs.”


Director Cindy Baer

Film Festival Tips

The film festival circuit can seem daunting and impossible, but Baer recommends it for small indie films hoping for the opportunity to find new audiences. “Besides being fun, you get to visit places you may not otherwise go, discover great movies that you may never have a chance to see again, meet amazing people, and make friendships that last a lifetime. My tips about festivals would be to create a strategy and do your homework. Most festivals will not play you if you've screened at another festival in their city, because it will be harder to get people to attend. It’s important to submit your movie to a festival that it would actually be a good match for.”


For more on ODD BRODSKY, Cindy Baer and Matthew Irving, check out:

ODD BRODSKY Facebook:  www.facebook.com/oddbrodsky
ODD BRODSKY Twitter:  www.twitter.com/oddbrodsky
ODD BRODSKY website: www.oddbrodsky.com

Cindy Baer website: www.cindybaer.com
Matthew Irving website: www.matthewirving.com


Contemplating the film festival route? Check out these tips for filmmakers from Sarasota Film Festival director Tom Hall. 


For more on the Redrock Field Cinema Bundle, microFollowFocus and microMattebox Deluxe, visit redrockmicro.com.  


Want to see more articles like this? Subscribe to this blog and get each new post delivered to your email or feed reader. 


Do you have tips for submitting films into film festivals? Share them below! 


Thursday, September 12, 2013

Filters and Matte Boxes in the Field

Why Optical Filters and Matte Boxes Still Matter in the Digital Age: Pt. 2


The second installment in our series, DP Josh Pickering stops by the Redrock studios to discuss and demonstrate specific examples of filters and how he uses them with his matte box in day-to-day productions. 


Check out the Redrock microMatteBox after the jump.


In case you missed it, check out part 1 of our series on types of filters and why matte boxes are still used in productions. 


What is your favorite filter or special effect filter you use? How important is it for you to "get it right" in camera?

Tuesday, September 3, 2013

Tom Gleeson, ACS & fxPHD's Mike Seymour on the microRemote: "An Amazing Value"

The award-winning microRemote made its way 'down under' and into the hands of fxPHD's Mike Seymour & Australian Cinematographer Society's Technical Committee member Tom Gleeson, who spent time with the microRemote and gave it a thorough review on the gear segment 'Top Tech.' 

Seymour and Gleeson cover details about the microRemote like lens mapping, which they call 'a big plus for much nicer, better control,' responsiveness of the system ('Redrock is right up there' with other professional systems) and they ultimately call the microRemote system a "great value for the money for any operator of a large format camera with focus issues."


Check out the interview here:


For more on the Australian Cinematographers Society visit their website.


Watch additional 'Top Tech' segments on the ACS Vimeo page. 


Check out the Redrock microRemote Remote Focus System after the jump.


Do you use a wireless follow focus or a traditional follow focus? Let us know below! 


Tuesday, August 27, 2013

Is the Blackmagic Pocket Camera Up to the Task?

5 Questions for Captain Hook, The Man Behind the Latest Sample BMPC Footage


As the Blackmagic Pocket Camera begins shipping, filmmakers anxiously await real-world feedback and reactions. Although the early BMPC footage gave viewers an idea on how the camera footage looks, does it meet the expectations? 

We spoke with Captain Hook, who shot and posted recent footage of the Pocket Camera (see end of article for video), and asked him five questions about his hands-on experience with the camera:


Redrock Micro: Does the BMPC live up to the hype?

YES! My perspective is somewhat distorted by being familiar with the BMCC 2.5K EF mount (which I've had since January this year) and having done a lot of reading and research about the Blackmagic Cameras in general, so I had a very good idea of what to expect in terms of firmware, features, and image. This time around, I got to not only grade the very first footage posted by John Brawley (who's incredibly talented and generous with his time/knowledge) from the Pocket Camera but to also get my own unit to beta test following that. I was really floored by the image and color, and that might seem strange having used the 2.5K version, but I'm still enamoured with that camera also. Both of these cameras cost less than our 2 Canon 5D3's we use for stills, it's just incredible. There will be a shock for some who don't know much about the BMD line of cameras currently, both good and bad. Missing firmware features like audio meters, in-camera formatting, remaining disc/record time, custom LUTs, etc, get requested often - but if you do your research prior and understand what you need to get going with these cameras then that stuff can be dealt with.


RRM: Now that you've had a chance to use it, have your thoughts changed for how you intend on using it? If so how?

Initially, I thought it would make a good B-cam to my 2.5K EF, but I didn't anticipate how often I would find myself taking it out with me just to 'capture footage' of what we may be doing. Being so portable, it really lends itself to that and really doesn't draw attention to itself. Or, you can choose to rig it up for a more 'production' type environment with all the bells and whistles if that's what you're doing. I guess I didn't realize how often I would actually take it out with me and use it, especially in situations where the BMCC is too big and cumbersome or just plain overkill. 


RRM: How do you find yourself dealing with the nearly 3x crop factor? 

I've gotten used to "translating in my head" what our lenses do from the EF mount, so I know what our lens set does equivalent to the same lenses on a 35mm full frame like the 5D3's or S35 sized sensor. The Pocket is multiplied by a higher amount, but it's just another conversion in your head to get used to. It helps to have wide, fast glass. We have a 14/2.8L, but I wish it was faster. The SLRMagic 12/1.6 interests me but I would get the MFT 2.5K first so I could use it on that too. The reality is though that 35mm full frame is generally my widest lens except for "special" shots. I personally don't really have much of a desire for anything wider than 12-14mm for these cameras. I do wish the Canon 85/1.2L worked on either the BMCC EF mount or the Redrock LiveLens adapter though. 


RRM: What are your three favorite and least favorite things about the Pocket Camera?

Favorite:

• The image (including the colour science and decent codec - 422HQ)
• Form factor (feels great in the hands when stripped down)
• Stealth and portability factor.
• Price! (oops, that's 4)

Least:

• Battery Life (I think external power is the best solution for me)
• Some missing firmware features I would like (in-camera format, customs LUTs, audio meters, disc remaining)
• Micro HDMI (HDMI is fragile enough, but clean HDMI to my Hyperdeck Shuttle makes up for it and allows me to record a lot of footage at 10bit 422HQ but at the cost of bigger 'footprint')


I think it's important for people to spend the time to research and read about these cameras on the various forums like Blackmagic Designs's own forum, and BMCuser.com. There's very knowledgable and helpful people on those sites that can give you insight not just into these cameras, but filmmaking in general. People like (again) John Brawley, Kholi Hicks, and Frank Glencairn. Armed with the right knowledge and expectations, I think this camera will make people very happy.


RRM: You use the Redrock liveLens MFT to adapt Canon L series glass. How do those lenses perform on the BMPC?

I've been really happy with the image quality from the Canon L glass, and I love that I can use them on my Blackmagic cameras, saving us from purchasing all new glass. I definitely have my eye on dedicated cinema glass for the future, but it also makes a lot of sense to hire lenses like that for jobs that need it. Because of that, I plan to eventually get the MFT 2.5K version so I can again still use the Canon L glass with the Redrock LiveLens adapter, but also get other adapters for PL mount and Nikon, etc. Pulling focus is obviously the big issue, but I've gotten a pretty good feel for pulling my own focus now with the lenses we have. A follow focus with hard stops is helpful, but I'm also eyeing up the Redrock microRemote with the Handheld Controller for AC's and fingerwheel as I like that you can remap the focus range etc.


Check out Captain Hook's BMPC test footage below:


For more on the Blackmagic Pocket Camera, visit the Blackmagic Design website.  


Check out the Redrock LiveLens MFT, which allows Canon EF lenses to be used with the Pocket Camera and be able to adjust the lens’ aperture, after the jump.


Want to see more articles like this? Subscribe to this blog and get each new post delivered to your email or feed reader. 


Special thanks to Captain Hook for his contribution to this article, you can learn more about his work at http://acoupleofnightowls.com.


Are you buying a Blackmagic Pocket Camera? Do you intend to use it for production purposes or as a point and shoot camera? Let us know below!


Thursday, August 15, 2013

Today’s Video Cameras Can Do it All, But Do You Want Them To?

Why Optical Filters and Matte Boxes Still Matter in the Digital Age: Pt. 1


This week’s guest post comes from Tiffen's MPTV Filter Group Consultant Carey Duffy. Carey has long been a recognized expert in filtration and has done extensive work with the London Filter Company and Tiffen to spread 'filter awareness.' Carey shares his experience with us on why optical filters and matte boxes are still a vital piece of the cinematographer’s toolkit in today’s digital age.


For more on Carey and everything filters, follow him at @Carey_Duffy on Twitter. Visit www.tiffen.com for more information on the filters seen here in this post.

Filters and matte boxes are key for controlling light entering the lens. Pictured 
 top, scene shot with no filter. Pictured below, scene shot with SMOQUE filter. 


Modern digital cinema cameras and DSLRs are truly incredible advances: they house large digital sensors that deliver amazing latitude and enable you to peer into shadows and seemingly see in the dark. Some have lossless codecs and even shoot totally uncompressed. 8 bit, 10 bit, even 12 bit color resolution eliminates banding and keeps colors accurate. 

There are log formats for maximizing latitude, high ISO for even more light sensitivity-- the features and power are endless. The post-production coloring and editing tools seem to compensate for just about everything you couldn’t do in-camera. Even with this kind of technology arsenal, optical filters and matte boxes are still standard-issue equipment used by virtually all the top productions today. Why? Because camera filtration and matte boxes can achieve things not possible in post and are an essential tool in getting the best results possible.

Filters are one of the many tools a cinematographer employs to control the light entering the camera lens, either as a physical necessity, for aesthetic effect, or even to achieve both these ends. The question of how to control the intensity of light, especially for exterior shots, means that the use of filters as a primary tool becomes paramount. 

Although the transition from film to digital has made the cinematography process less complex with the introduction of built-in features such as ISO adjustment, filtration not only gives better results, but offers many things that just aren’t possible in post production or with fancy sensor electronics. Let’s take a look at how filters can give you the best results.


ND Filters

Many people ask me what is the main reason cinematographers, directors of photography (DoPs), or videographers use multiple filters. Often, the simple answer is for correcting the exposure while keeping shutter speed and aperture constant. Neutral Density (ND) filters cut down the amount of light without adjusting camera settings. This is vitally important if you are shooting with a lot of light and want to keep your aperture open for a nice shallow depth of field (such as keeping your interview subject in focus while throwing the background out of focus). Adjusting the camera’s shutter speed or lens aperture would result in a different look and feel. Built-in camera ND is often not exact enough to maintain your camera settings.


Graduated and Attenuated ND Filters

A variant of ND filters are graduated and attenuated filters, which cut down the amount of light in a specific area. This is typically used to cut down the bright sky so the exposure is more even between the action on the ground and the overhead light. Graduated ND goes from some ND to clear, whereas attenuated filters have a graduated ND across the entire filter, never going to clear.  There are also choices for hard and soft edge graduated ND as your scene dictates (hard edges are often used with architecture to even out exposures or for dramatic effect). What’s most important about using these filters is the ability to rotate and slide to position the graduation so it matches the horizon. A matte box enables you to get that exact filter placement (more on matte boxes later).


Infrared (IR) Cut Filters and Hot Mirrors

The dramatically increased sensitivity of modern digital cinema cameras have come at the expense of increased infrared (IR) light pollution. This typically shows up as a red or purple cast in the blacks and shadows. When adding ND filtration, the IR pollution effect is often increased, leading to footage that is colored strangely, and difficult to correct in post. An IR Cut filter (as referred to as a “hot mirror” filter) helps eliminate the infrared light pollution. This can be an extra filter added into the filter stages, or ND filters can be purchased with the IR cut built in to them (since ND tends to make the IR pollution worse).


Top: no filter. Bottom: with IR filter. Note cleaner blacks
                                                       

Polarizers

Polarizers are one of the most frequently used camera filters in cinematography. This is because they are both technically fixing and aesthetically enhancing. From a technical improvement, polarizers are used to remove unwanted reflections, such as through glass, shooting over water, etc. 

Polarizers have to be rotated to find the angle at which they cut the glare or reflection, so they need to be set up and work at a specific place. This is why polarizers are recommended primarily for locked-off video shots rather than shots where the camera is actually moving, since moving the camera would also change the polarizer’s angle and spoil the effect. 

Also just to clear up a common misconception: a “circular” polarizer does not refer to the filter being round. There are plenty of square or rectangular circular polarizers. Circular polarizers are almost exclusively used nowadays instead of linear polarizers. There is a lot of complicated stuff behind this, but essentially circular polarizers work correctly with today’s modern autofocus and metering systems.


                                                    Left: no filter. Right: with polarising filter


Contrast Control Filters

All of the filters mentioned so far generally deal with controlling light at constant camera settings, or to help control exposure. Contrast control filters have a very important part to play in the ability to control uneven exposure “looks” within a frame.

                                                     Left: no filter. Right: with polarising filter 

For example, a stronger density is generally used on a long focal length establishing shot, since the light hitting the image sensor is only passing through a small part of the filter’s area. Conversely, a lighter density of filter is used for a wider close-up shot as more of the filter’s area is being used. For this reason contrast control filters come in a number of different varieties and densities. 

They are not designed by stop densities but by increment, to take into account the different focal lengths of lenses used and to create continuity across a scene. Switching between densities depends on focal length and the image in frame. It’s just one part of the effort a cinematographer needs to put in to ensure the continuity of the look across all of the film that is being produced for a particular project.

Low contrast filters create a small amount of ‘localized’ flare near highlight areas within the image, and this reduces contrast by lightening nearby areas of shadow, leaving highlights almost unchanged. Soft contrast filters include a light-absorbing element that, without exposure compensation, will reduce contrast by also darkening highlights, and cinematographers use these when lighter shadows are not desired. In both cases, the mild flare produced from bright highlights is sometimes used as a lighting effect.


Color Conversion Filters

With electronically controlled white balance, color conversion filters are less used nowadays, but there are great choices for converting daylight to tungsten, or vice versa, without any adjustments in post-production. Sometimes color conversion filters can be used to create a special effect look.


Top: no filter. Bottom: with 85b CC filter

Matte Box: the Essential Accessory for Filters


microMatteBox
On professional sets and productions, you almost always see a matte box used in conjunction with filters. Like filters, a matte box performs some vital functions that simply can’t be replicated in post, and help you get the best images possible. 

In addition to holding filters, a matte box protects the lens and the filters from unwanted light sources that create flares and lens reflections that can ruin a shot. When you put filters in front of your lens, you increase the number of optical surfaces where light can bounce around and create havoc. 

The matte box provides both a shade (the ‘deep box’ in front of the filter) and flags/side wings to extend that shade so light is blocked from directly hitting the filters and lens.

For motion pictures the standard size of filters is 4x5.65”, also known as Panavision size.
Filter Trays
This wide size is ideal for the wider HD aspect ratio, especially when using wide angle lenses.

Matte boxes are much more versatile than screw-in filters because they enable you to:
  1. Make fast lens changes without having to remove/re-attach filters.
  2. Reduce the amount of filter handling. Less of a chance of dropping or scratching.
  3. Invest in one set of filters, regardless of size or style (still versus cinema).
  4. Protect your filters and lenses from unwanted dust, dings/knocks, and falls.
Filter Tray


There’s quite a number of matte boxes available today in varying price points. The best matte boxes are those that have the following features:
  1. Support the full 4x5.65” standard filter size for motion picture production
  2. Have a swing-away design for fast lens changes
  3. Solid construction including metal fasteners, knobs, and swing-away construction
  4. Multiple 360 degree stages
  5. Add/remove stages to tailor the size and weight of the matte box to your needs
  6. Filter stage locks, so filters don’t accidentally fall out.


Having a tool designed to offer a wide range of flexibility in sculpting how individual glass filtration effects can be applied consequently becomes of primary importance. A matte box will enable a filmmaker or cinematographer to build up an extremely personal and useful inventory of filters that they will constantly use and add to, allowing the filmmaker or cinematographer a playground of in-camera creativity at the heart of image capture.

Putting It All Together


This feature is merely intended to be an introduction to the world of filters, so you can consider what filter tools you should be employing to burn-in your look on your moving images. Each production, scene and location requires individual consideration if you are going to achieve your desired look.

Knowing what tools will enable you to achieve the look you are after is part of the job of being a cinematographer. If you have filters and a matte box readily on-hand they can also provide a crucial last-minute fix to unexpected problems that digital post-production software can’t touch.


Check out the Redrock microMatteBox after the jump. 


Want to see more articles like this? Subscribe to this blog and get each new post delivered to your email or feed reader. 


What is your favorite filter or special effect filter you use? How important is it for you to "get it right" in the camera?